一. Shopify店铺添加Terms & Conditions主体
您的Shopify店铺有Terms & Conditions页面吗?(请按照有或无的条件进行操作,二选一)
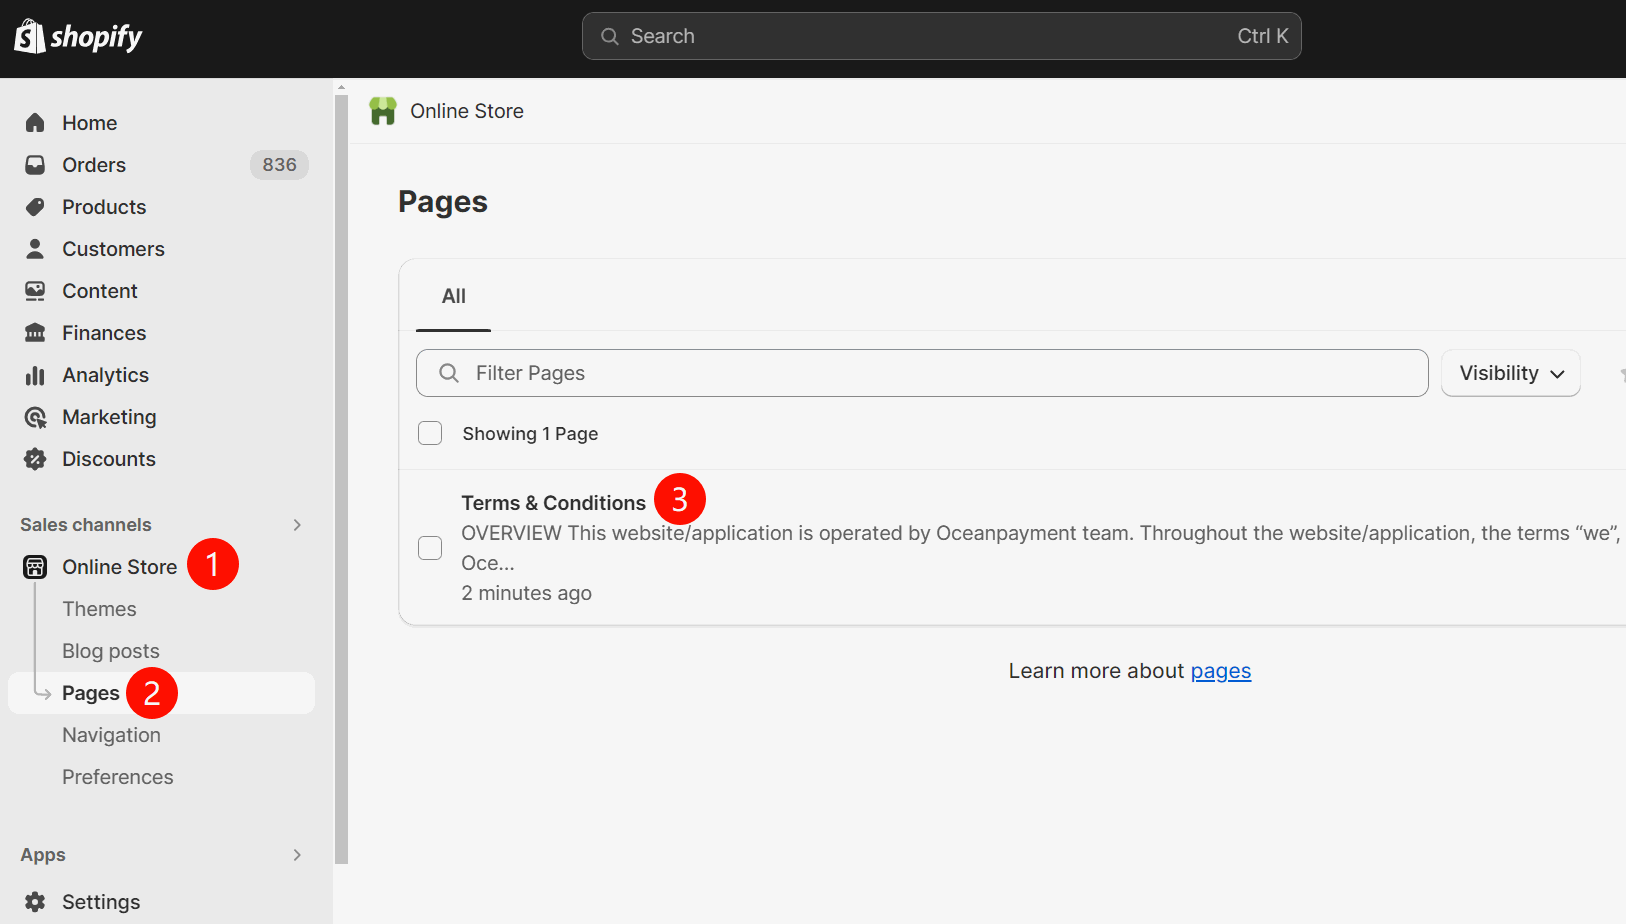
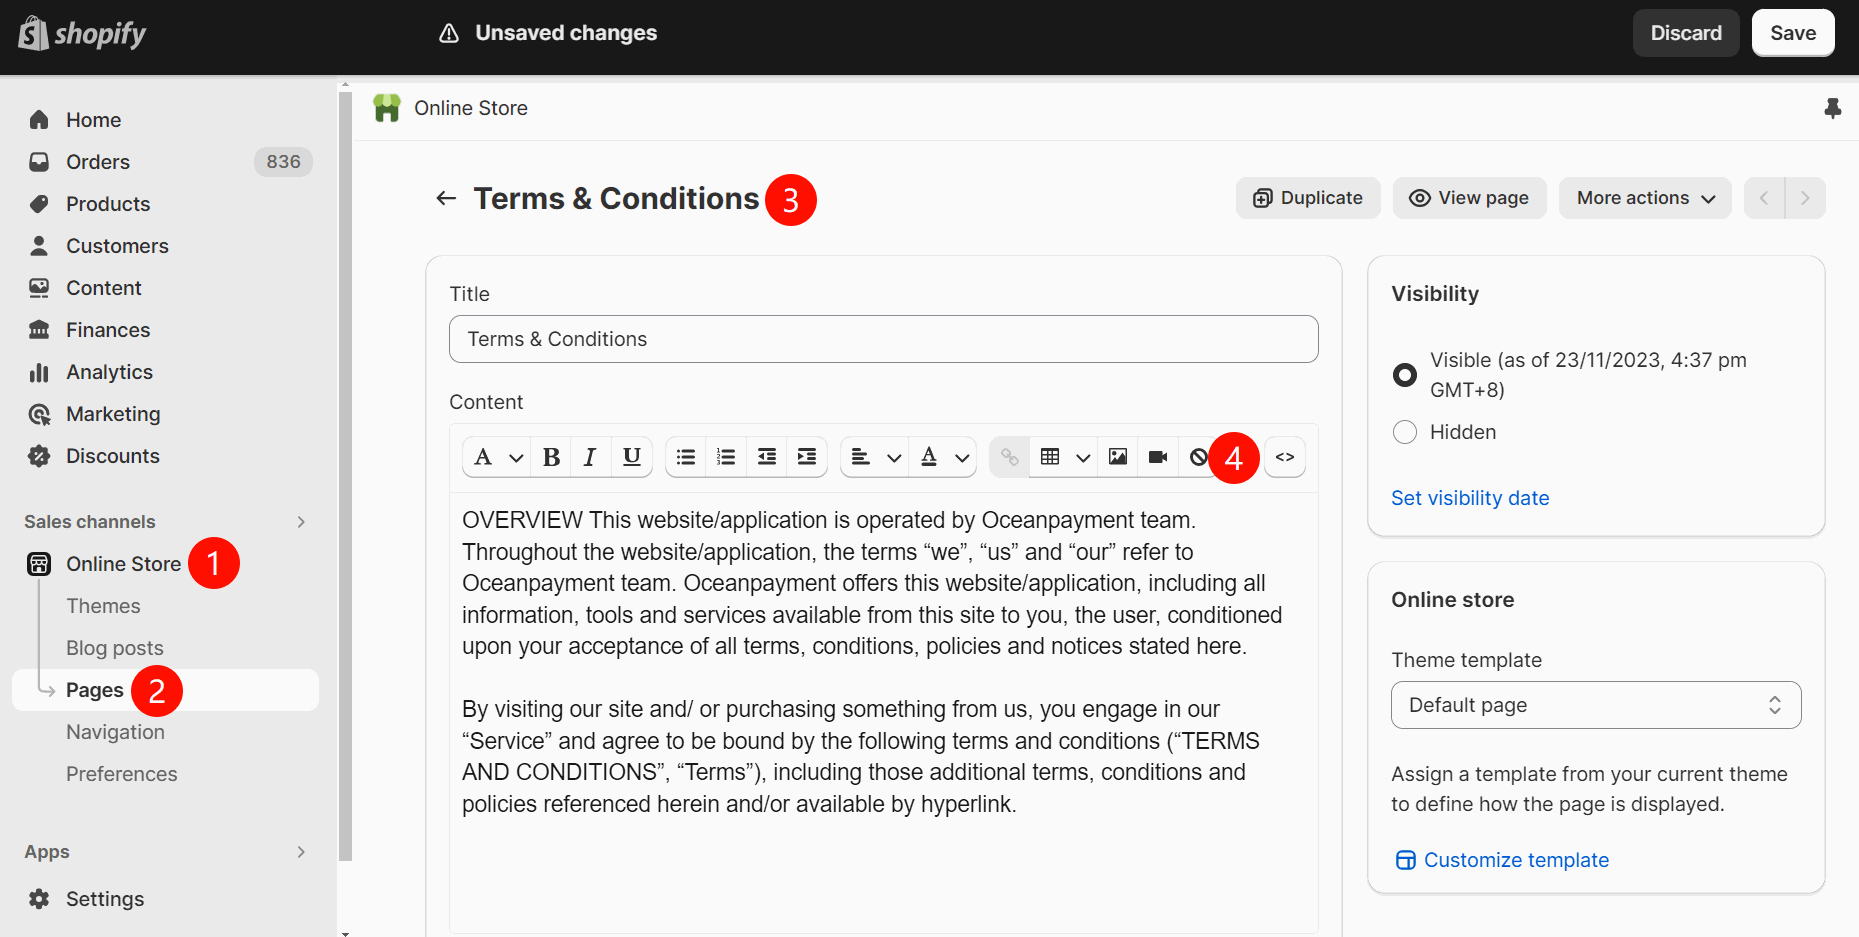
(一) 我有Terms & Conditions页面:
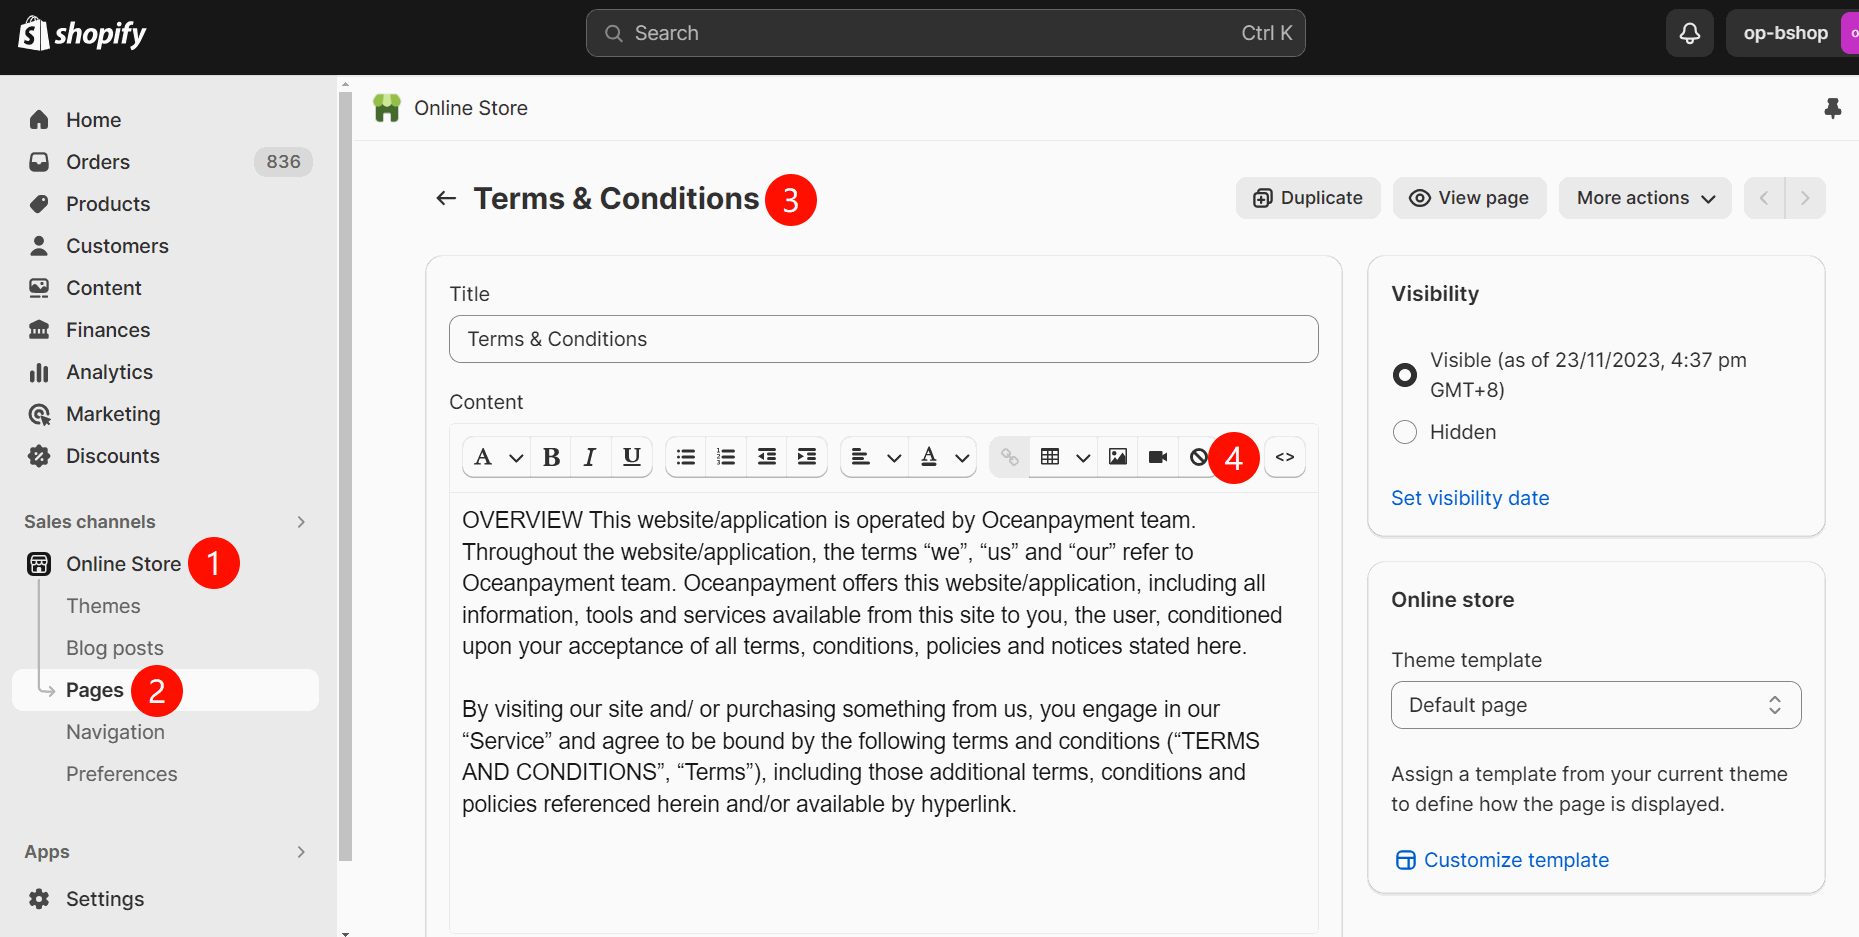
1.1 请在店铺后台菜单【Online Store】-【pages】或者【Settings】- 【Policies】找到您的Terms & Conditions页面:
或者:
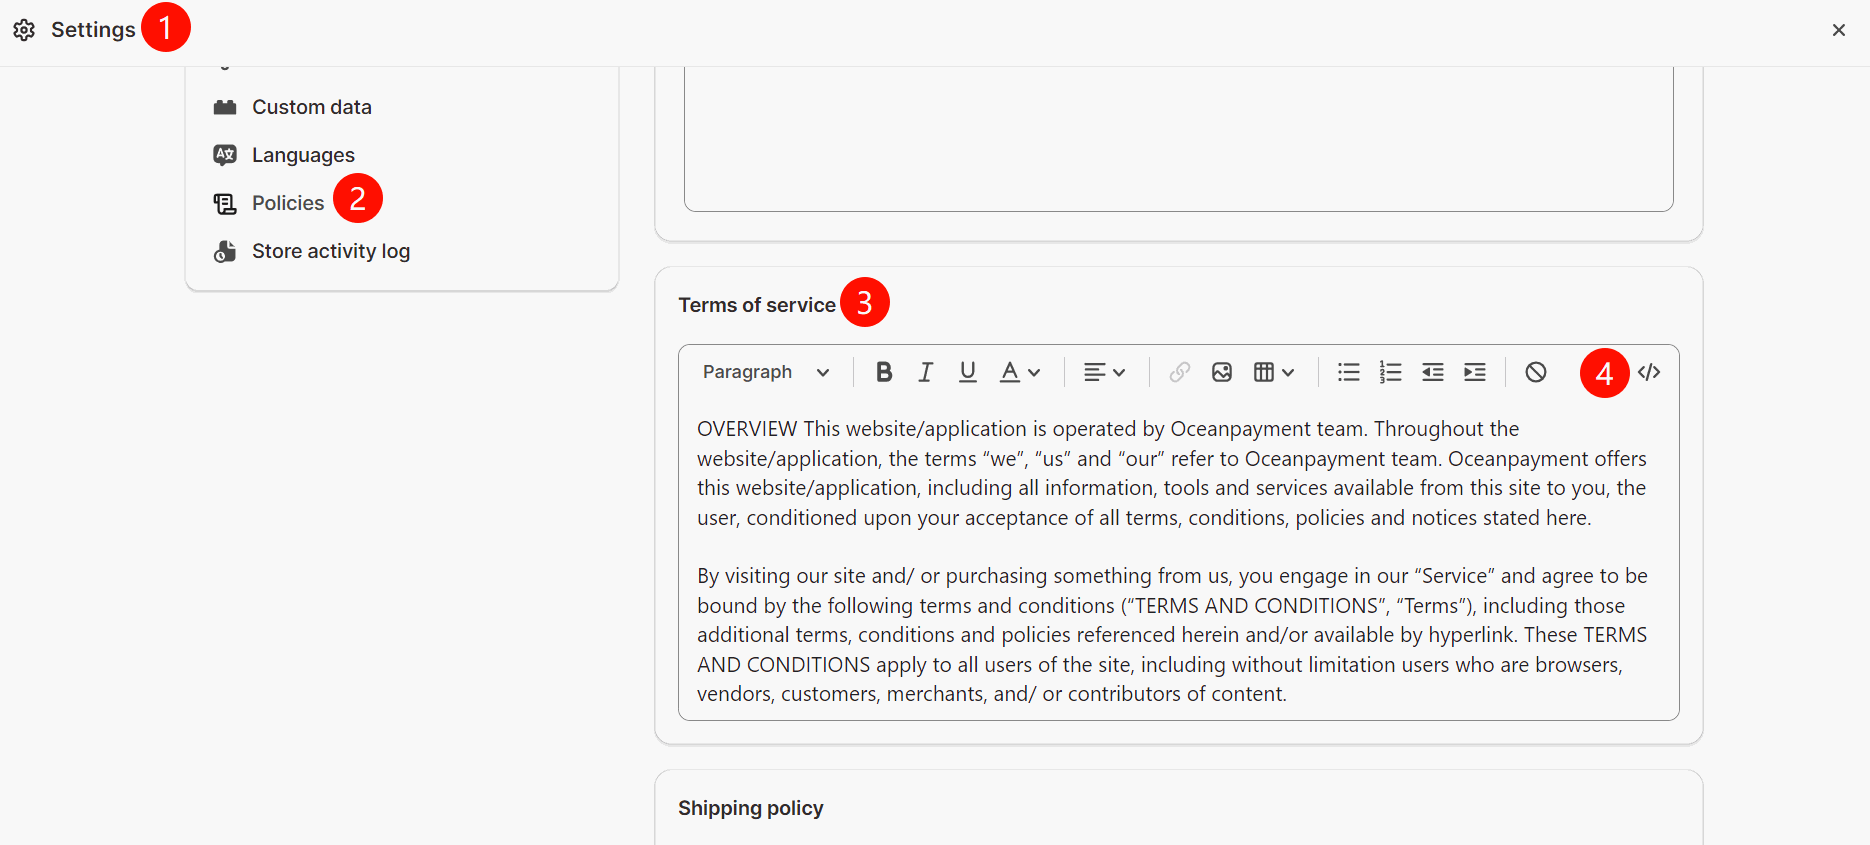
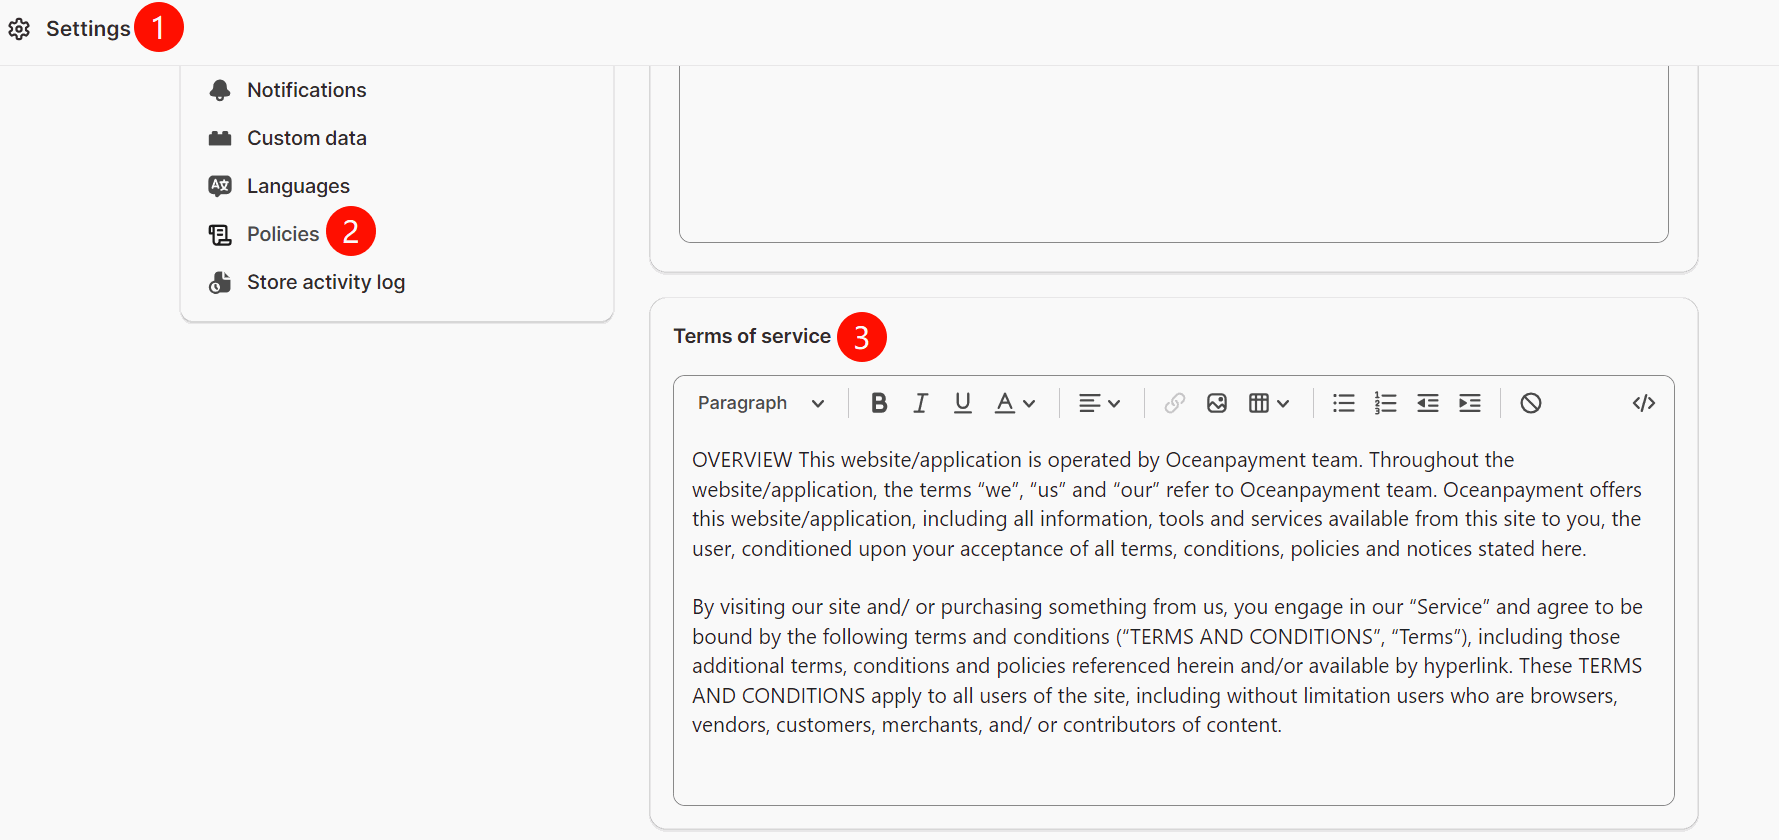 1.1.1 在Terms & Conditions页面代码编辑中,
添加图片的条款链接:<img src="https://www.9-bill.com/index/img">
或者文字的条款链接:<object type="text/x-scriptlet"
data="https://www.9-bill.com/index/text" width="100%"></object>
(链接二选一,具体添加哪一种链接,以Oceanpayment提供的网站修改意见文档为准。)
l 当您的Terms & Conditions页面在菜单【Online Store】-【pages】时:
操作演示一:添加 <img src="https://www.9-bill.com/index/img">

操作演示二:添加 <object type="text/x-scriptlet"
data="https://www.9-bill.com/index/text" width="100%"></object>

l 当您的Terms & Conditions页面在菜单【Settings】- 【Policies】时:
操作演示一:添加 <img src="https://www.9-bill.com/index/img">

或者操作演示二:添加 <object type="text/x-scriptlet"
data="https://www.9-bill.com/index/text" width="100%"></object>
(二) 我没有Terms & Conditions页面:
1.2 请在Shopify后台菜单【Online Store】-【pages】创建Terms & Conditions页面,同时在Terms & Conditions页面代码编辑中,
添加图片的条款链接:<img src="https://www.9-bill.com/index/img">
或者文字的条款链接:<object type="text/x-scriptlet"
data="https://www.9-bill.com/index/text" width="100%"></object>
(链接二选一,具体添加哪一种链接,以Oceanpayment提供的网站修改意见文档为准。)
l 菜单【Online Store】-【pages】
操作演示一:添加 <img src="https://www.9-bill.com/index/img">
或者操作演示二:添加 <object type="text/x-scriptlet"
data="https://www.9-bill.com/index/text" width="100%"></object>
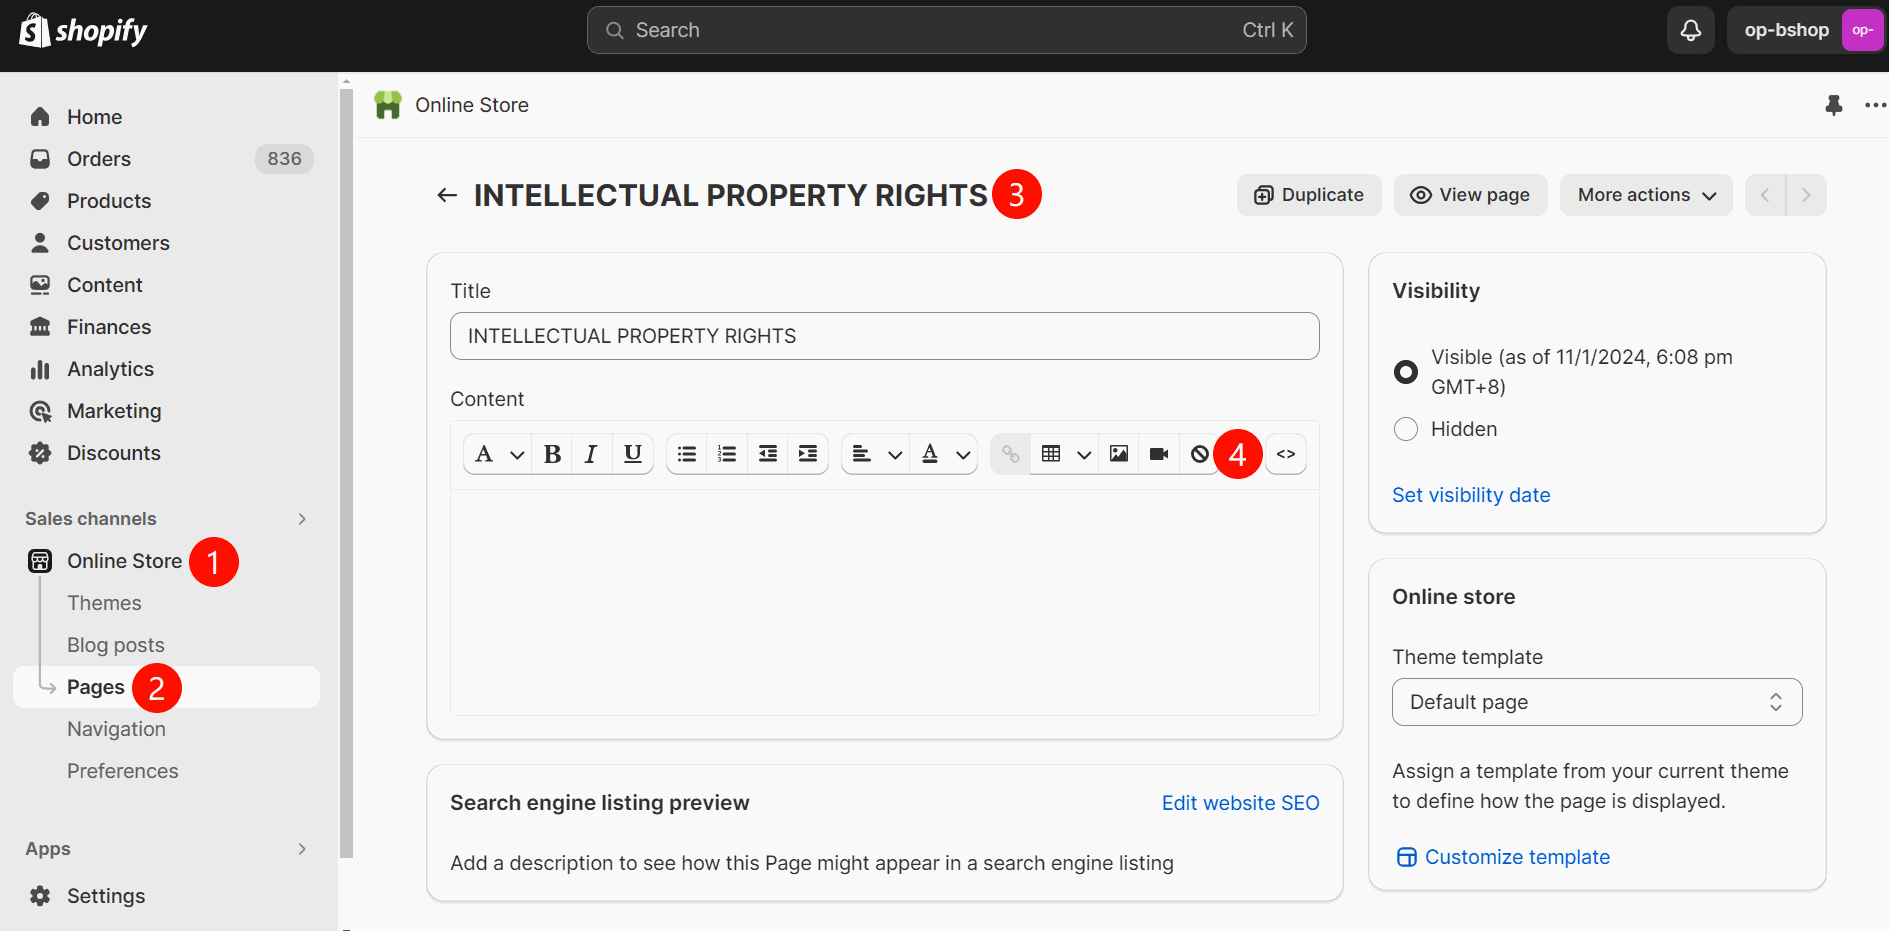
二. Shopify店铺添加INTELLECTUAL PROPERTY RIGHTS条款
2.1 请在Shopify后台菜单【Online Store】-【pages】创建INTELLECTUAL PROPERTY RIGHTS页面(如果没有该页面),在页面代码编辑中,
添加图片的条款链接:<img src="https://www.9-bill.com/index/legal">
或者文字的条款链接:<object type="text/x-scriptlet"
data="https://www.9-bill.com/index/legal" width="100%"></object>
(链接二选一,具体添加哪一种链接,以Oceanpayment提供的网站修改意见文档为准。)
l 菜单【Online Store】-【pages】
操作演示一:添加 <img src="https://www.9-bill.com/index/legal">

或者操作演示二:添加 <object type="text/x-scriptlet" data="https://www.9-bill.com/index/legal"
width="100%"></object>
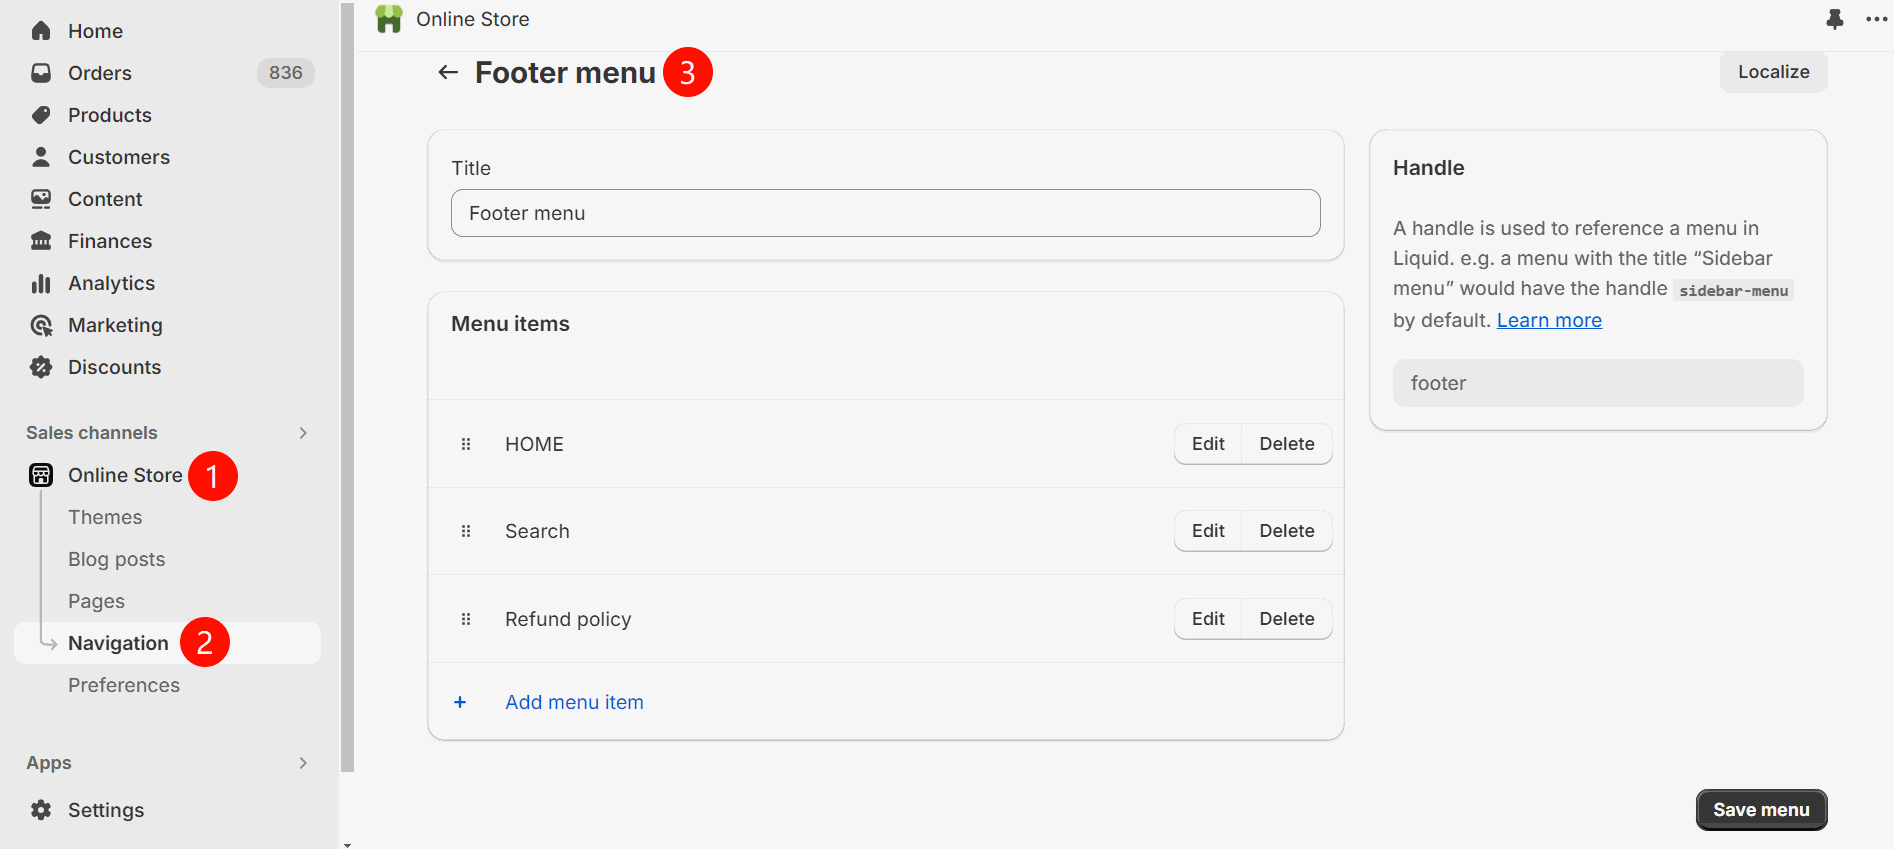
三. 如何将条款页面添加至网站底部?
3.1 在Shopify后台【Online Store】-【Navigation】-【Footer menu】菜单中,添加Terms & Conditions 和 INTELLECTUAL PROPERTY RIGHTS页面即可。
四. 卡Logo修改
网站底部需要使用最新的彩色卡组织LOGO,可通过以下链接下载最新LOGO进行添加:http://download.oceanpayment.com.cn/
如果添加上遇到困难,可找我司技术协助。(注意:Shopify网站若网站并未激活信用卡支付渠道,则无需添加卡LOGO)
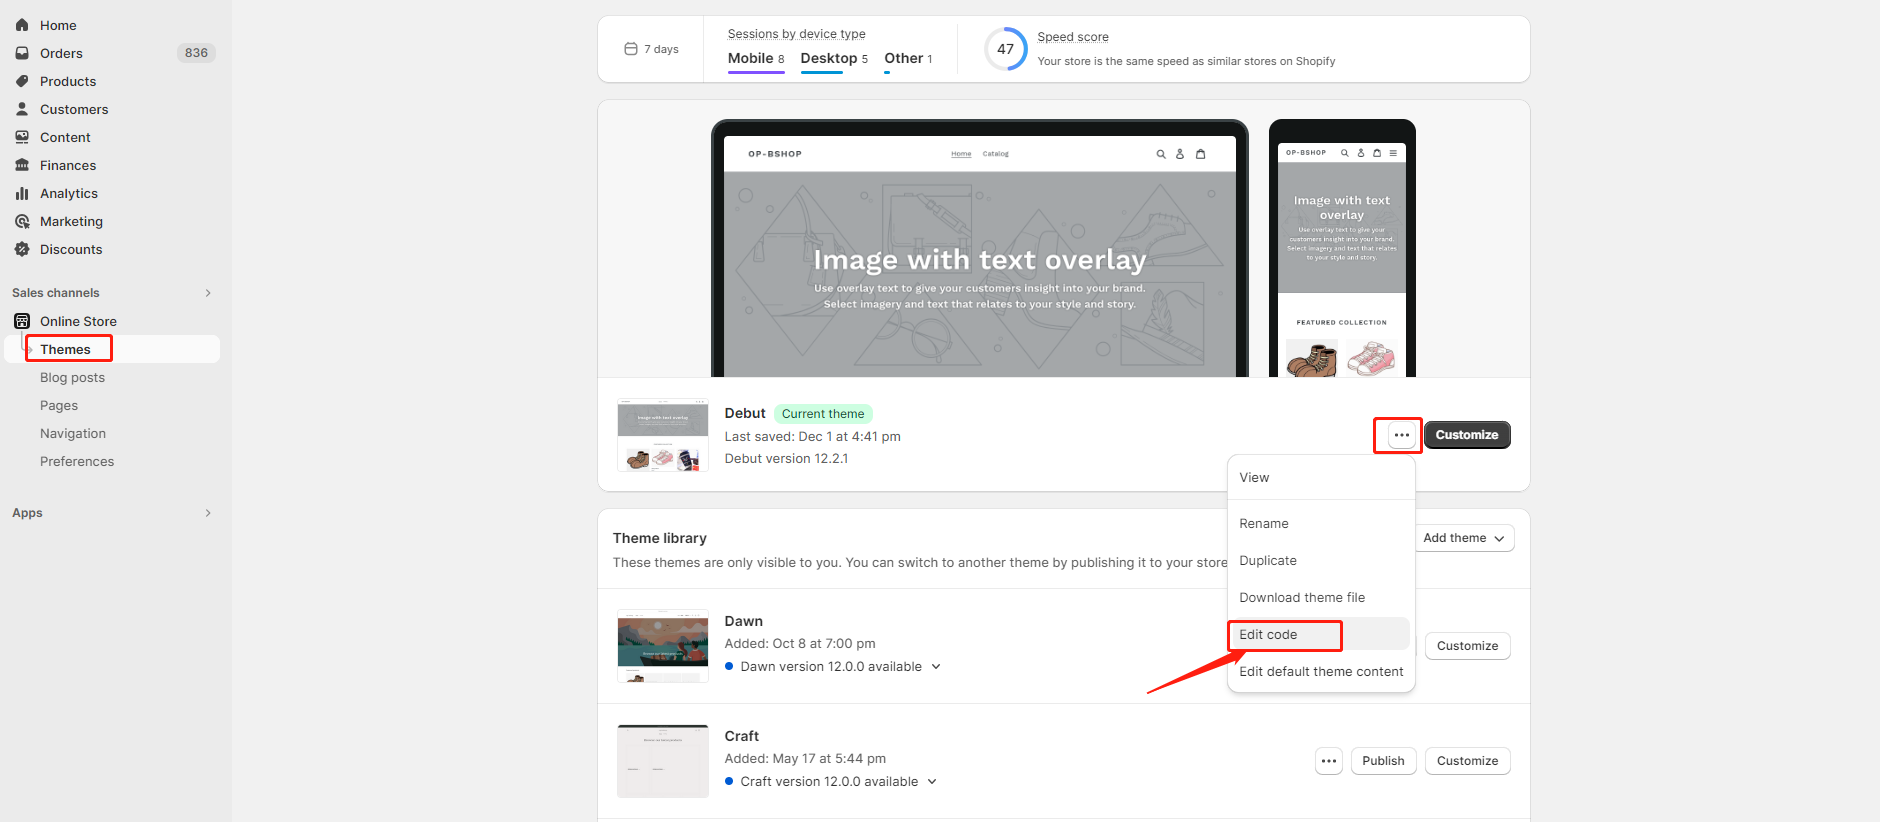
4.1 点击theme-Action-edit code
4.2 搜索footer文件,在代码中搜索payment(快捷操作ctrl+F)
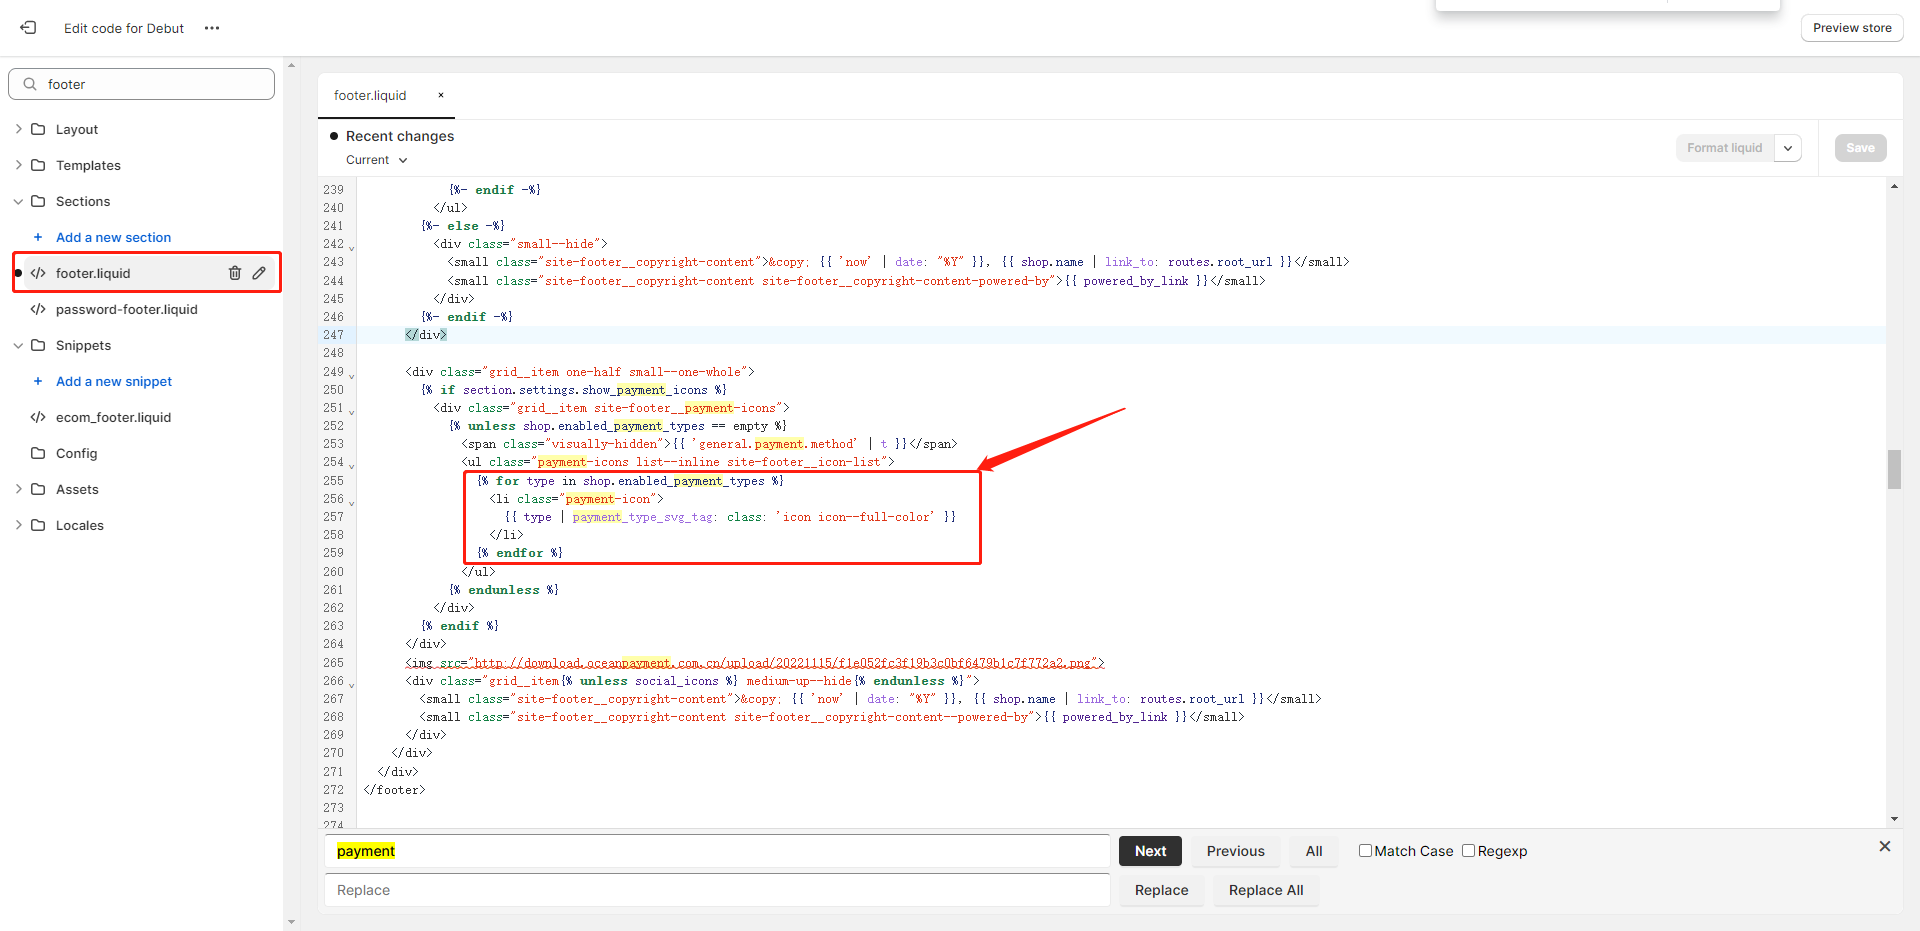
4.3 找到for标签,将这几行代码进行注释,选中这几行代码按ctrl+/,注释之后在下一行添加以下代码:
<img src="{{ 'visa' | payment_type_img_url }}" height="25" alt="visa" />
<img src="{{ 'master' | payment_type_img_url }}" height="25" alt="master" />
<img src="{{ 'maestro' | payment_type_img_url }}" height="25" alt="maestro" />
<img src="{{ 'jcb' | payment_type_img_url }}" height="25" alt="jcb" />
<img src="{{ 'american_express' | payment_type_img_url }}" height="25" alt="american express"/>
<img src="{{ 'diners_club' | payment_type_img_url }}" height="25" alt="diners club" />
<img src="{{ 'discover' | payment_type_img_url }}" height="25" alt="discover" />
<img src="{{ 'klarna' | payment_type_img_url }}" height="25" alt="klarna" />
<img src="{{ 'google_pay' | payment_type_img_url }}" height="25" alt="googlepay" />
<img src="{{ 'apple_pay' | payment_type_img_url }}" height="25" alt="applepay" />